A Step-by-Step Guide to Using a Photography Studio Lighting Kit Effectively

Above: A portrait I took outside during the afternoon with an external flash.
Below: A portrait I took inside with multiple external flashes at nighttime.
Introduction
As a professional photographer, you’ll need to know how to effectively utilize a variety of external flashes and equipment contained in a lighting kit. There are many different equipment settings and studio setups to be familiar with so you can find the best way to light your subject. This process can be challenging, but this manual will instruct you to successfully operate your lighting kit.

[A photo studio with a white backdrop and lighting equipment]. B&H Photo Video Audio. https://www.bhphotovideo.com/explora/photography/buying-guide/recommended-lighting-kits-for-photography
Glossary
Most standard-grade lighting kits will include these tools:
· An external flash is a flash not built into the camera body.
· A monolight is a self-contained studio flash often standing on a tripod.
· A strobe light is a quick, sudden burst from a monolight or similar flash rather than a continuous flash.
· A radio transmitter is the communication link between the camera and the external flashes.
· A reflector is a long, reflective surface used to reflect light onto the subject.
· A diffusor/softbox is a cover, often shaped like an umbrella or spotlight that is placed on an external flash to evenly spread the light.

[A photo studio with monolights and diffusors]. Digital Photography School. https://digital-photography-school.com/studio-lighting-equipment-guide/
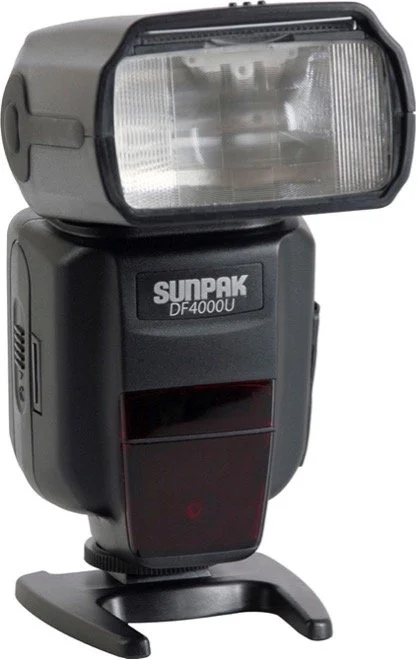
[A Sunpak DF4000U external flash to be mounted on a camera]. Best Buy. https://www.bestbuy.com/site/sunpak-df4000u-external-flash/5960804.p?skuId=5960804-
Light Functions
· A key light is the main light illuminating the subject.
· A fill light “fills” dark areas like shadows and brightens the exposure.
· A backlight is set up behind the subject to help separate the subject from the background.
· A rim light is set closer to the subject and produces a line of light around the subject. This technique is used to create a dramatic effect.
WARNING!
External flashes will expose the subject(s), photographer, and any others present in the room to flashing lights that could trigger epileptic seizures or other distressing symptoms.
Finding the perfect Lighting Setup
It’s important to note that no photoshoot will ever require the same lighting formula. This is a process of trial and error. The style, composition, and intent of the photoshoot will determine the best possible lighting. But these step-by-step guidelines will ensure that you light your subject in the best way possible without missing any beats.
1. Work with natural light.
Before opening the kit, it’s important to analyze your natural light. In this case, this is any light produced by things other than your kit. This includes sunlight, indoor artificial lightning (such as lamps and ceiling lights), and your camera flash. Sometimes, natural lighting is adequate on its own.
2. Positioning your lights.
If you decide your lighting kit tools are necessary, it’s time to try different lighting positions.
Set your lighting sources up on different sides of the subject. Notice how shadows and highlights change as you try different angles. Depending on the subject and composition of the photo, light setups will vary.
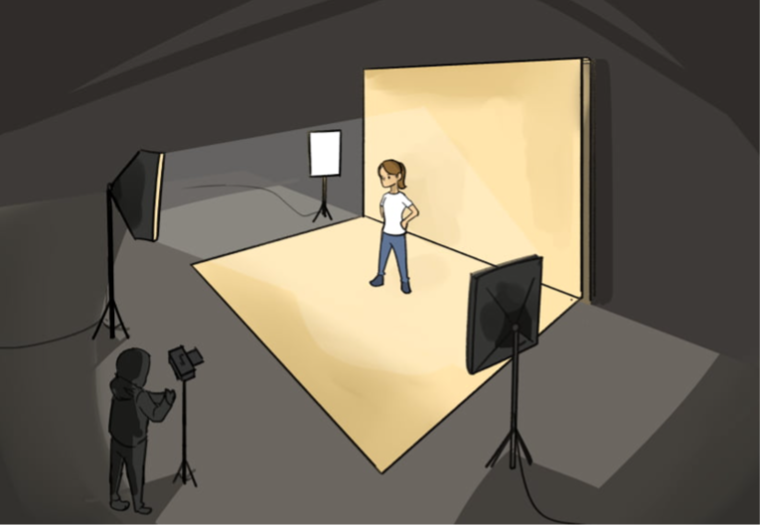
[A cartoon drawing of a studio. A woman stands in the center of three lights while photographer stands on the side]. Shot Kit. https://shotkit.com/three-point-lighting/
3. Using soft light versus hard light.
You can utilize soft light, hard light, or a mix of both. Hard light creates a sharper contrast and darker shadows. Soft light decreases contrast and increases the range of midtones.
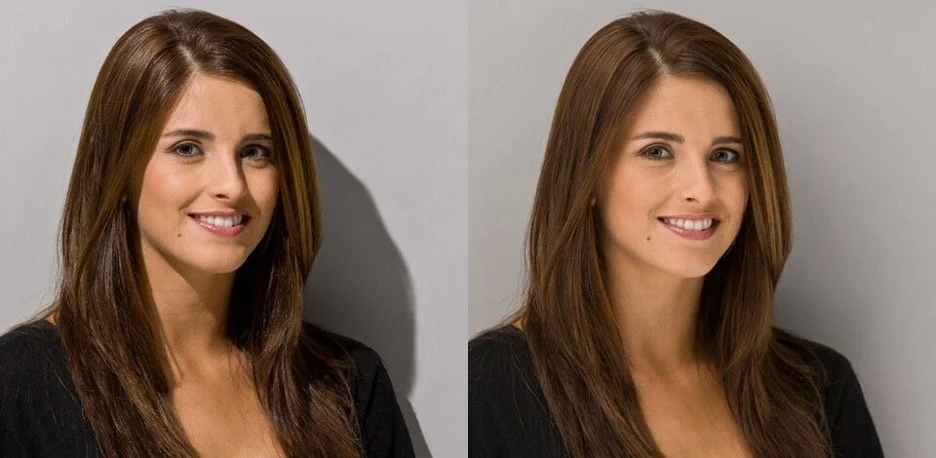
[Two portraits of a woman are side by side. The photo on the left is an example of hard light, and the photo on the right is an example of soft light]. Fix The Photo. https://fixthephoto.com/hard-light-vs-soft-light.html
Use a reflector to reflect hard light back onto the subject to create contrast or reveal more detail.
Use a diffusor over a light source to spread the light more evenly across the subject and create a softer light.
Experiment with both hard and soft lighting and decide which is best based on the subject and style of the photo.
4. Determine your color temperature.
The lights you use will vary in color. These are measured in Kelvin (K) from 7500K (blue and cool) to 5500K (daylight) to 2500K (red and warm).
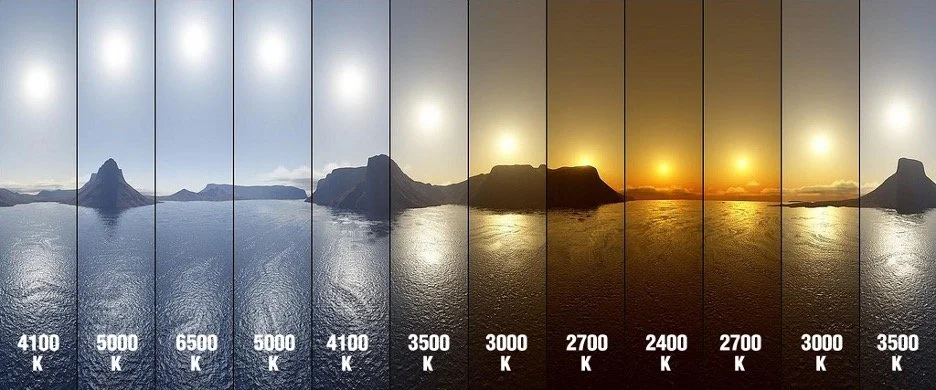
sunTemperature. (2019) [Various photos of the sun represent the Kelvin temperature color scale in photography]. PixelSham. https://www.pixelsham.com/2019/10/18/color-temperature/suntemperature/
LEDs tend to cast a cooler light, whereas standard house bulbs are warmer. Florescent lights are much warmer. Often, lights in kits will have multiple light colors built into their bulbs with settings the photographer can manually change.
Be sure to be familiar with all your color settings and experiment with each to determine the best setting based on the subject and style of the photo.
Success!
Now that you’ve followed these guidelines, you’re ready to make the most of your lighting kit.
Experiment with different techniques and don’t be afraid to try everything. Happy photographing!
References
Mateer, P. (2023, July 28). Beginners Guide to Lighting Techniques. Shot Kit. https://shotkit.com/photography-lighting/